How to Put a Divan Bed Together: A Step-by-Step Assembly Guide
Overview & What You’ll Need
Before you begin, it’s important to note that not all divan beds are assembled in exactly the same way. The divan bed frame plays a crucial role in the assembly process, providing stability and a connection point for headboards and other components. Always refer to your model’s instruction manual for any model-specific details. In general, though, most divan bed bases are designed to be DIY-friendly with minimal tools.
-
Instruction Manual: Ensure you have the correct manual for your specific model. Checking for pre-drilled bolt holes is essential as they facilitate the fitting process by allowing bolts to be secured into place, ensuring a stable connection between the two parts of the base.
What You’ll Need:
-
Screwdriver: For securing headboard bolts and tightening any fixings.
-
Rubber Mallet: Ideal for gently tapping clips or fixing U clips into place without causing damage.
-
Allen Key: Often provided for tightening specific fittings.
-
Instruction Manual: Always have it on hand to refer to model-specific steps.
Many divan beds come with pre-installed connectors such as U clips or link bars, so extra tools may not be necessary. Still, having these essentials at the ready can simplify the process.
Preparation: Setting Up Your Workspace
Proper preparation is key to a smooth assembly. Follow these steps before you begin:
-
Clear the Area: Ensure you have ample space to work, especially if you’re assembling in a smaller UK flat.
-
Check All Parts: Lay out all components and verify that nothing is missing. If any parts are absent, contact customer service immediately.
-
Carefully Open Packaging: Carefully open any packaging to avoid damaging components.
-
Read the Instructions: Familiarise yourself with the specific assembly steps provided in your manual.
Taking a few minutes to prepare your workspace and check your parts can save you time and prevent frustration during assembly.
Follow These Steps to Put a Divan Bed Together
Step 1: Joining the Two Halves
Most divan beds come in two separate halves that need to be joined together. Follow these guidelines:
-
Align the Edges: Position the two halves so that the flat ends line up correctly. The pre-drilled bolt holes on each side of the divan facilitate the assembly with link bars.
-
Secure Fixing Points: Use the pre-installed fixing points (such as U clips or link bars) to join the halves securely. Ensure a snug fit by correctly positioning the clips on either side of the base.
Tip:
If the clips feel overly tight, a gentle tap with your rubber mallet can help them lock into place without damage.
Accurate alignment and careful handling of the fixing points ensure that your divan base forms a sturdy foundation.
Step 2: Clipping the Divan Bed Base Together
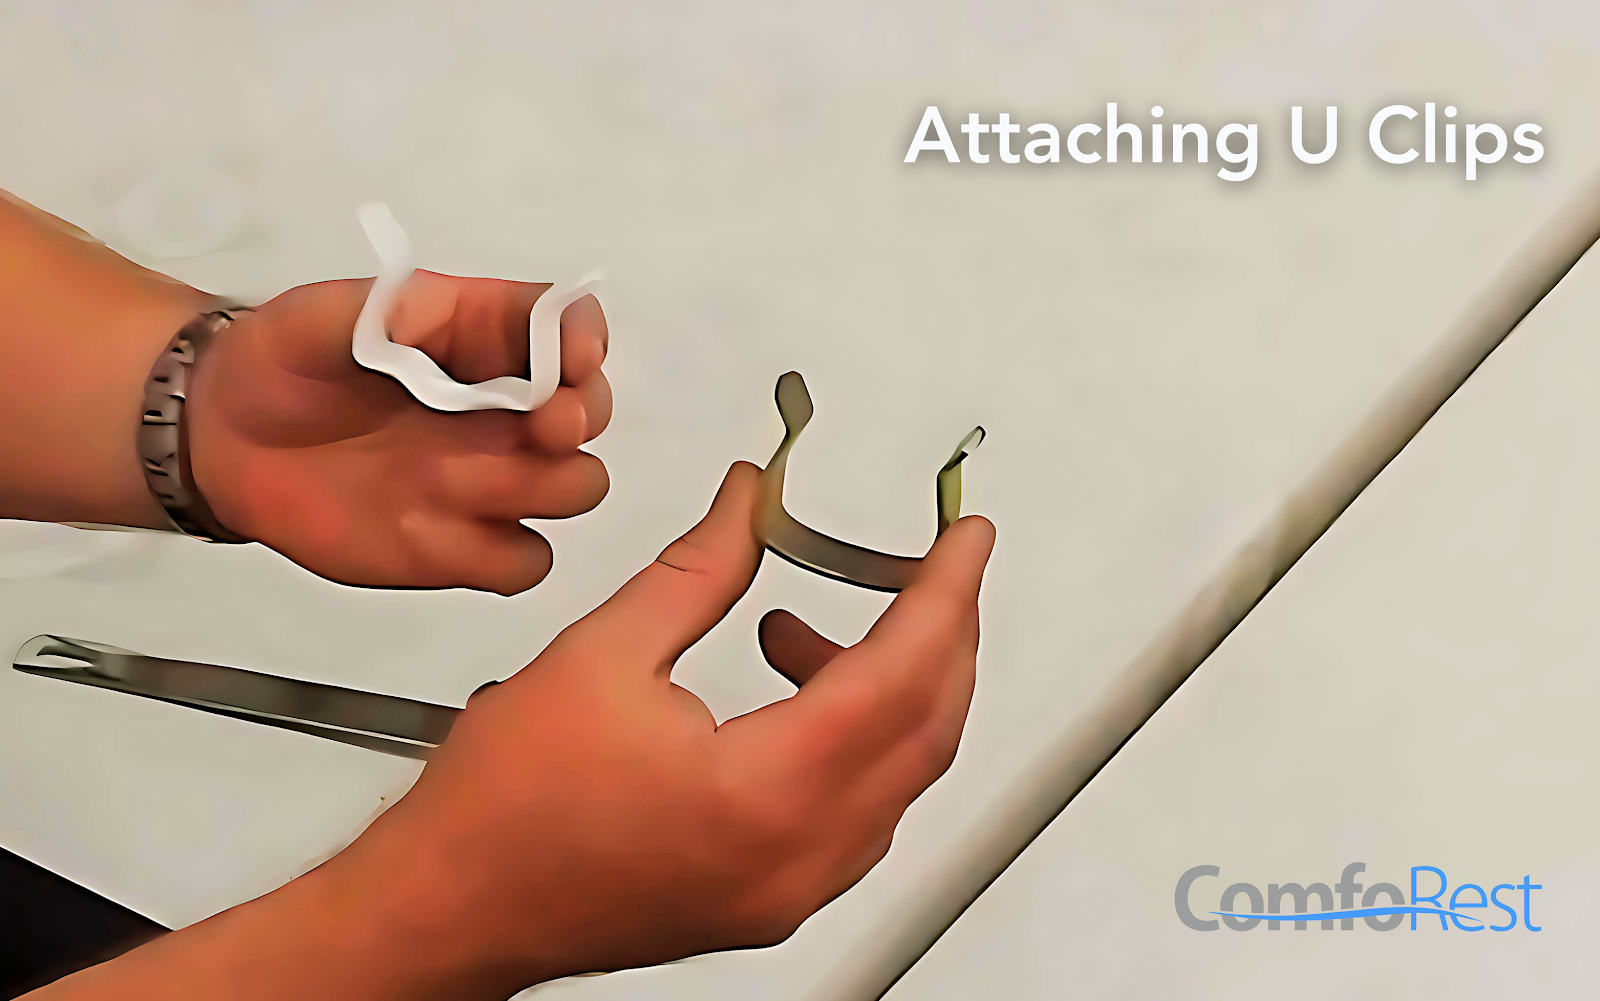
Attaching U Clips
-
What They Do: U clips are metal brackets that hold the two halves of your divan bed base together. They require no additional screws or tools.
-
How to Fit: Simply align the pre-drilled holes on both halves and press the U clip into place.
U clips provide a strong, stable connection quickly and easily - no extra hardware is needed.
Installing Link Bars
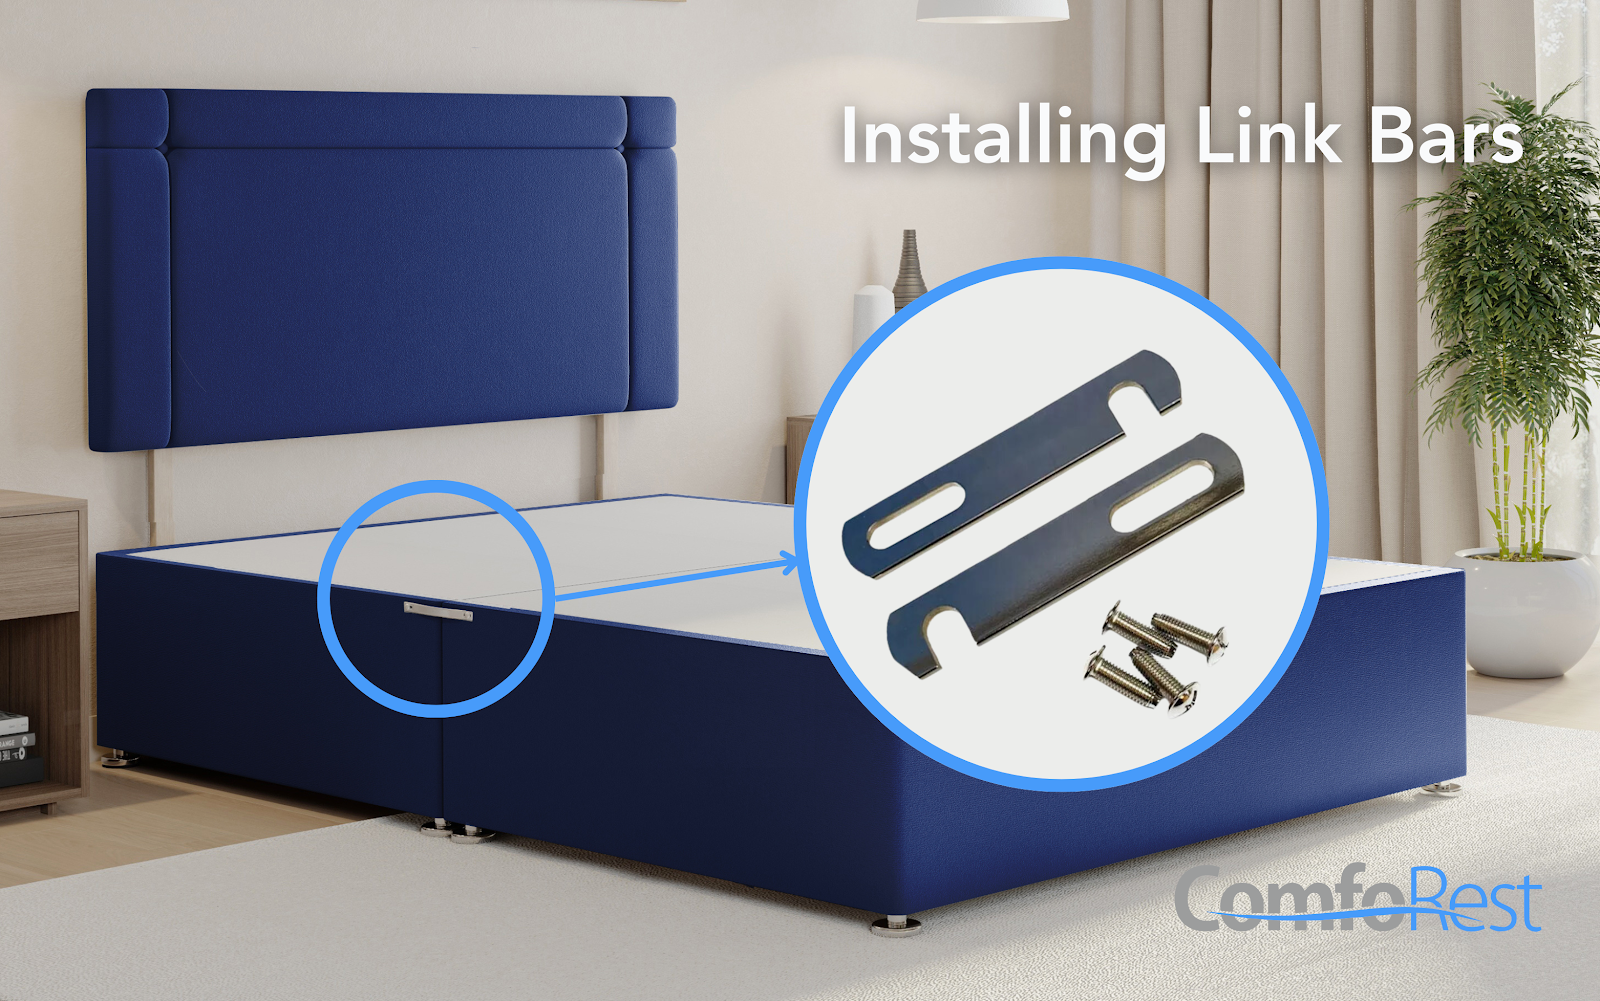
For larger divan beds (such as king or super king sizes), link bars may be used for additional stability:
-
Align and Insert: Make sure the link bars are fully inserted and aligned with the pre-drilled holes. If the clips are compressed, carefully open them by hand to ensure proper alignment.
-
Secure Tightly: Use the provided mechanism (or a tool if required) to ensure the link bars are locked in place.
Tip:
A firmly installed link bar reduces movement and ensures long-term durability for larger beds.
Both U clips and link bars are designed to create a secure, wobble-free bed base with minimal effort.
Step 3: Attaching the Headboard

Attaching a divan bed headboard can complete your bedroom’s look while also providing extra support:
-
Positioning: If your headboard features an adjustable height, align it so that the top is level with your mattress. The bed frame plays a crucial role in attaching the headboard securely.
-
Secure Attachment: Follow the model-specific instructions to fix the headboard to the divan base.
Tip:
Double-check that all bolts are tightened to avoid any movement once the bed is in use.
A well-attached headboard adds both style and function, enhancing your overall sleeping experience.
For a more detailed step-by-step guide, check out our blog: how to attach headboard to divan bed
Step 4: Installing Feet, Gliders, or Wheels
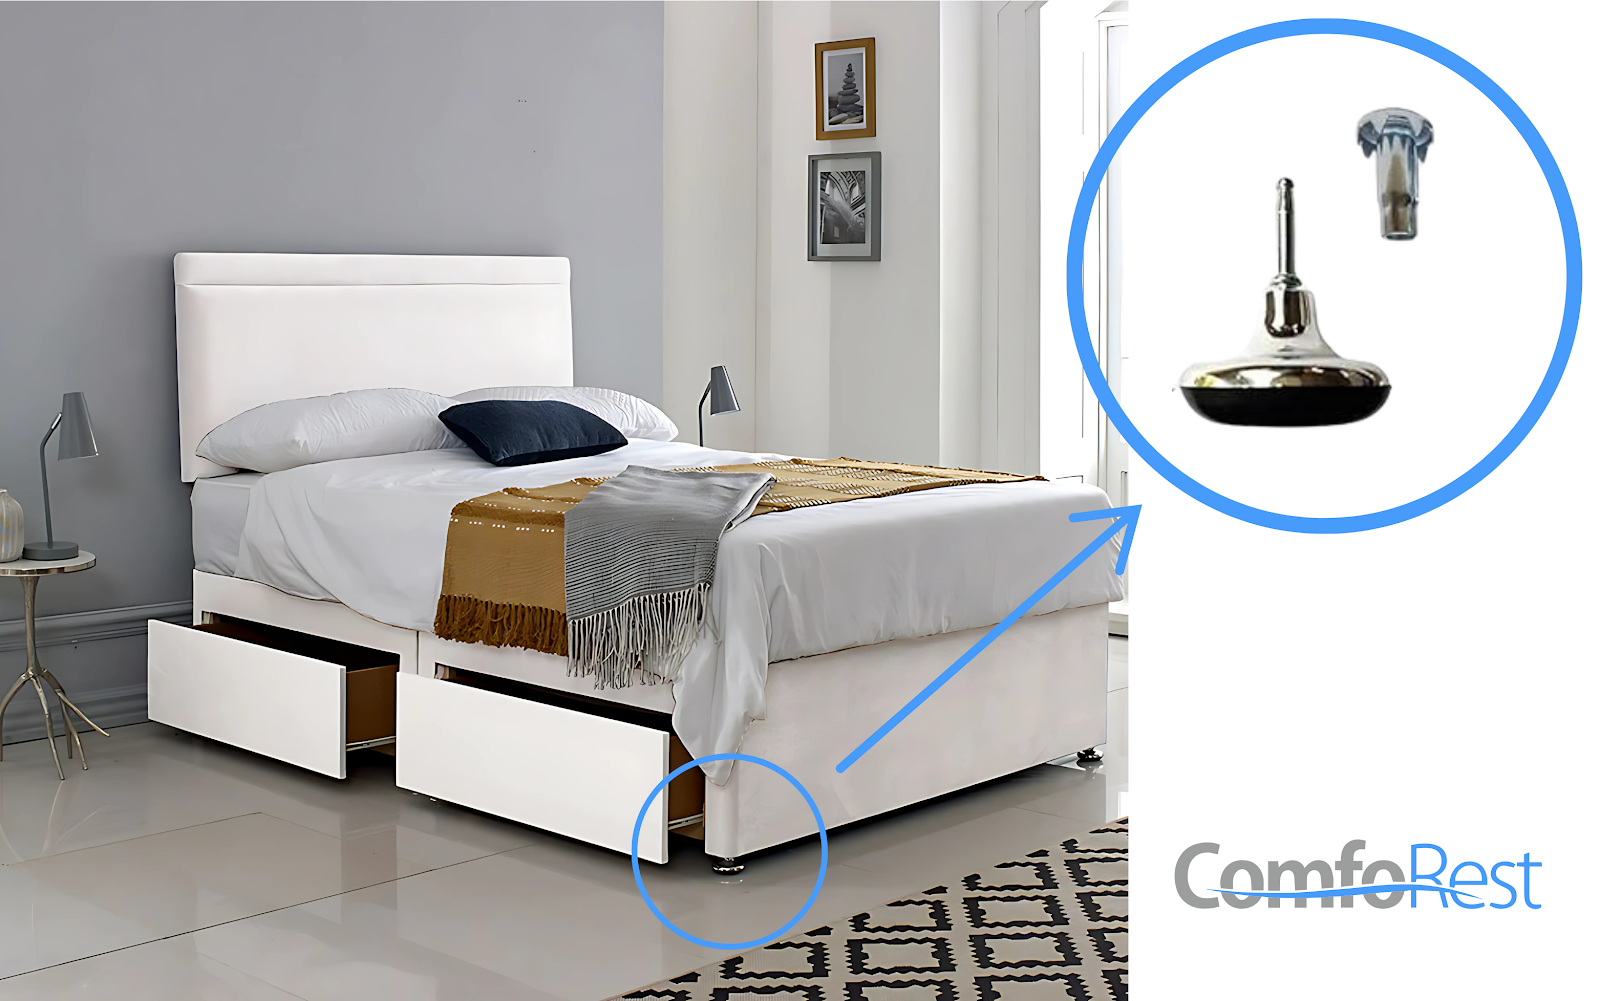
Adding feet, gliders, or wheels not only elevates your bed but also improves its stability and mobility:
-
Attach the Components: Securely fit the feet or gliders into the designated spots. Follow the manufacturer's instructions to attach feet properly, whether your bed base is wooden, silver metal, or has castors. If your bed comes with wheels, ensure they are locked in place if required.
-
Test Stability: Once installed, gently shake the bed to confirm that all components are firmly attached.
Properly attached feet or gliders prevent wobbling and make rearranging your room or cleaning easier.
Troubleshooting & Maintenance
Even well-assembled divan beds may occasionally need minor adjustments or regular care to maintain optimal performance and longevity.
Troubleshooting Common Issues
-
Squeaking:
-
Cause: Often caused by loose screws or friction between moving parts.
-
Solution: Tighten any loose bolts and apply a lubricant spray to U clips or divan bed link bars.
-
Misalignment:
-
Cause: Incorrect joining of the two halves.
-
Solution: Re-check the alignment and re-seat any misfitting components.
-
Loose Fixings:
-
Solution: Periodically inspect and tighten all screws and bolts.
Maintenance Tips
-
Clean Regularly: Vacuum the base and wipe down surfaces to prevent dust buildup.
-
Inspect Periodically: Check for any signs of wear or loose parts every few months.
-
Avoid Overloading: Adhere to recommended weight limits to ensure longevity.
Regular maintenance and prompt troubleshooting help keep your divan bed in optimal condition for years to come.
Conclusion
Learning how to put a divan bed together is a straightforward process that most homeowners can accomplish with basic tools and careful attention to detail. Once you align the two halves and secure them with U-clips or link bars, the rest — such as adding the headboard and feet — comes together easily.
The key is not to rush. Taking a few extra minutes to prep and double-check parts can save time and hassle later. And with a quick check-up now and then — like tightening bolts and giving it a light clean — your bed will stay solid for years.
There’s absolute satisfaction in putting it together yourself. Not only do you get a sturdy setup, but you also sleep better knowing you did it right.